Having your own pool sitting in your backyard sounds like a delight.
Unfortunately, no matter how much entertainment it brings, we can’t enjoy it all year round. As summer ends, the temperature starts to drop.
That’s when you know it’s time to prepare your pool for the coming winter season. Unless you have an inflatable jacuzzi, which you can simply take inside or let the air out of and dismantle.
We wouldn’t want frozen water on our above ground pool, would we?
Thankfully, this task doesn’t have to be dreadful and can be done in a matter of hours if done correctly.
Below is an easy step-by-step guide on how to winterize your best above ground pool.
First off, you’re going to need these things:
- Pool cover
- Cover winch and cable
- Cover clips
- Water bags (if you have a walk around deck)
- Air pillow
- Return plugs, can be rubber or plastic
- Winter skimmer cover
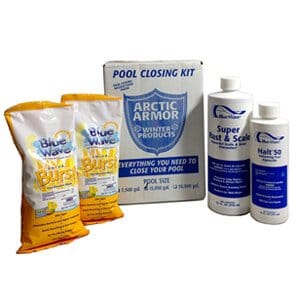
- Winter chemical kit
Once these items are gathered, it’s time to bid goodbye to your pool. Temporarily, of course.
1. Test The Water and Balance Its Chemistry
Before you start, pool water needs to be tested. This is an important step on how to winterize an above ground pool. You will need a test strip for this to make sure it is balanced.
Then, you have to make sure that the water’s pH is neutral. If the water turns out to have a low pH, it’s acidic so you have to add a base, such as sodium bicarbonate, to achieve neutrality. The same goes when the pH is high, you need to add acid to the water to lower down the pH to a proper balance.


When all of this is settled, it’s time to test the water’s alkalinity. Alkalinity is the measure of carbonates, bicarbonates, hydroxides and other alkaline substances in the water and is strongly related to your pH levels. The ideal level of alkalinity is between 80-120 ppm.
Just like the water’s pH and alkalinity, its calcium hardness needs to be tested too. Ideally, your pool water’s calcium hardness should be between 180 – 220 ppm.
2. Clean The Pool
The next step on how to winterize an above ground pool is to clean it. I think this one’s pretty obvious. The first thing to remember when adding any winter chemicals is that the pool needs to be as clean as possible. Remove all deck equipment, including ladders, stairs, etc.
Brush down the sides and floor of your pool and then vacuum. This step prevents staining, which can occur if any dirt or debris is left to sit in the pool.
3. Shock The Pool Before Closing


Above ground pools usually have a winter chemical kit, so you can easily add everything as instructed. Check the directions carefully as some kits don’t require to run the filter while adding them.
On the other hand, if you don’t have a kit, shock the pool with chlorine shock and a recommended amount of winter algaecide to remove any contaminants that could cause stains or algae during winter. You can use a 15-minute fast dissolving shock before putting on the cover instead of the typical 8-hour calcium hypochlorite shock.
3. Plug It Up
The eyeball fitting on your return line needs to be removed. Then, plug it with a rubber plug using a wingnut. On the skimmer, remove the basket. Along with the return fitting, the skimmer basket needs to be dried and stowed safely for the winter months.
Using a winter skimmer cover is optional but these might come in handy. As the name suggests, it covers the entire skimmer so you don’t have to drain the pool below the skimmer. However, if you don’t have one or you just don’t think there’s a need to use it, make sure the skimmer on your pool can drain out water if it rains.
Because when water or heavy snow fills up your empty skimmer, it might be heavy enough, which is not advisable for your skimmer wall, and can cause the skimmer to crack. You don’t want that to happen, right?
4. Winterize The Filter And Pump
Among the steps on how to winterize an above ground pool is, of course, winterizing the filter and pump. For the pump, completely remove all the drain plugs to empty out and remove the pump, all the hoses, and chlorinator, if you have one.
It is convenient to keep away all the drain plugs and store it in the pump basket so you can have them all together, and don’t have to find everything piece by piece. Keep the pump, chlorinator and hoses indoors for longer storage lives.


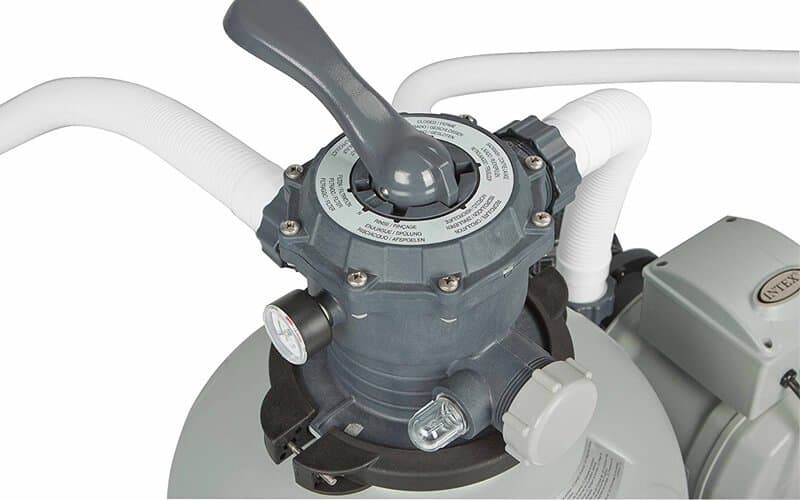
Whenever you’re done with the pump, it’s time to move on to the filter. If you have a sand filter, set your multiport valve to Winterize and take out the bottom drain plug. This way, the filter can be completely drained out. If your multiport valve has a bleeder valve and at a sight glass, remove those too and store them, along with the other items, in the pump basket.
If you have a DE filter, drain it and rinse off the grids with a hose. This will remove the excess DE. Leave the valves open. Follow the same steps for a cartilage filter, and store it indoors.
Once you’ve disconnected your filter and pump system, store all the equipment you have indoors. In the case of sand filters, it might be a little heavy to move indoors. If you plan to leave it outside, make sure to remove all the drain plugs so whenever water or condensation builds up inside the tank and freezes, it won’t crack the filter tank. For DE and cartilage filters, moving it indoors should be a breeze since they are comparatively lighter.
5. Drain And Add The Air Pillow
Make sure the hose from your skimmer is removed so it can properly drain, then install a winter skimmer cover plate. If you do these steps, you don’t have to drain your pool. It is a better option for your winter cover to keep your water level normal.
Having a solid cover and keeping the water below the return lines might put added pressure on your cover when water and snow builds up on top. When this happens, you might face a more involved process since you have to keep draining water off the cover with a pump or siphon.


Now, it’s time for the air pillow. An air pillow is used to prevent the sides from bearing the pressure whenever water turns to ice. Inflate it and put in the middle of the pool. Using a thin rope might help in securing it in the middle.
6. Put The Cover On
Finally, we are down to the last step in how to winterize an above ground pool. Winter pool covers for aboveground pools come in a variety of round and oval sizes, order by pool size for a perfect fit. Place your pool cover over the top of your pool, and over the air pillow. Secure it in place with a cable and winch, water bags, or a combination of winter cover clips and a cable.
Throughout winter, you should always keep track of your pool every once in a while, especially the pool cover.
Winterizing your above ground pool might not be your favorite task in the world, and it doesn’t have to be. It only needs to be done properly, and you’re good to go. Besides, you’ll only have to do it once a year.
